Search This Blog

Showing posts with label Air Condicioner. Show all posts

Sunday, August 5, 2018

Top Causes of Mold in Your Home Appliances


The following report is a copy of the Sears Home Services website about Top Causes of Mold in Your Home Appliances. 

how to get rid of mold in appliances


Where there’s moisture, there could be mold. Keep mold out of your washer, fridge and dishwasher with these tips.

Mold could be growing inside your appliances without your even knowing it. It can lurk in your washer, dishwasher or fridge — and that doesn’t mean artisan blue cheese. Simply put, mold grows where moisture lives, explains the Centers for Disease Control and Prevention (CDC), and since these appliances all work with water, they’re susceptible to mold growth.

What causes mold? Poor venting in appliances, leaks, clogged drains — and dare we say it? — user error.
Everyone knows mold is gross, but more than the yuck factor, it can do a number on your health, especially if you’re sensitive to it, according to the CDC. You can experience a variety of symptoms from exposure to mold, including a stuffy nose, coughing, throat irritation or skin irritation. If you have mold allergies, a chronic lung disease like asthma or a compromised immune system, you could experience even more severe reactions or an infection.
Health concerns aside, do you really want mold in the appliances you’re using to clean your clothes and dishes and store your food?
Fortunately, there are things you can do to help banish mold from your appliances. We’re breaking down the most common mold culprits and fixes, with help from Jeffrey McBride, an appliance expert at Sears Home Services. Remember to consult your owner’s manuals first for information on how to properly care for your specific appliances.


Mold in Your Appliances: Where It Grows and How to Get Rid Of It

Mold

Front-Load Washers


Where Mold Hides: The door seal and detergent drawer What Spawns It: Trapped moisture when the door or detergent drawer are closed

How to Kill It: Mix:

  • 2 cups white vinegar
  • 1/4 cup baking soda
  • 1/4 water
Wipe affected areas.
Life-Saving Tip: Leave the door and detergent drawer open when not in use. Also, don’t let laundry sit.


Top-Load Washers


Where Mold Hides: Between the drum and interior walls
What Spawns It: Water and humidity after a load

How to Kill It:


Run the Clean Washer cycle once a month if your washer has one. Otherwise, run a hot water cycle with 3 to 4 cups of vinegar.
Life-Saving Tip: Don’t use too much detergent. Leave the lid open after each use.


Refrigerators


Where Mold Hides: Between the door seals (and on neglected food, of course)
What Spawns It: Warm air mixes with moisture and lack of ventilation

How to Kill It:

Spray hydrogen peroxide or vinegar and wipe clean. Use a toothbrush or cotton swab to get into crevices.
Life-Saving Tip: Clean spills immediately and wipe down with vinegar once a month.


Dishwashers


Where Mold Hides: The filter, silverware basket, interior panels and door gasket
What Spawns It: Damp food particles left behind after a cycle.

How to Kill It:

Scrub the interior and gasket with diluted bleach. Once a week, clean out the gasket and run an empty cycle. Also check the silverware basket and filter.

Sunday, July 29, 2018

Reemplazo y Mantenimiento correctivo a un sistema de aire acondicionado y refrigeración.

Como remplazar un compresor.

  1. Desmontaje de piezas.
  2. Sacar los componentes eléctricos, desconectar el cable de encendido, sacar el relé y el protector térmico, también se hace necesario sacar el capacitor.

Pruebas eléctricas.

Enseguida también es necesario averiguar la continuidad eléctrica en el cable de encendido.

  • También se realiza lo mismo con el protector térmico verificamos su continuidad. 
  • La capacitancia del capacitor.
  • En el relay,  la verificación debe ser hecha en la bobina principal.
  • Bobina de arranque verificación de continuidad.
  • Continuidad en la bobina del compresor a través de los tres contactos del Compresor. haciendo prueba en 2 de cada fila.
  • Si muestra contactos abiertos es que el motor esta quemado, si mostró continuidad es que eso significa que el motor está en buen estado.
  • Al momento de desmontar el motor debe de liberar el fluido refrigerante.
  • Para liberar el refrigerante se necesita una válvula perforadora que se conecta en la tubería de servicio y abrir la válvula para liberar el fluido.

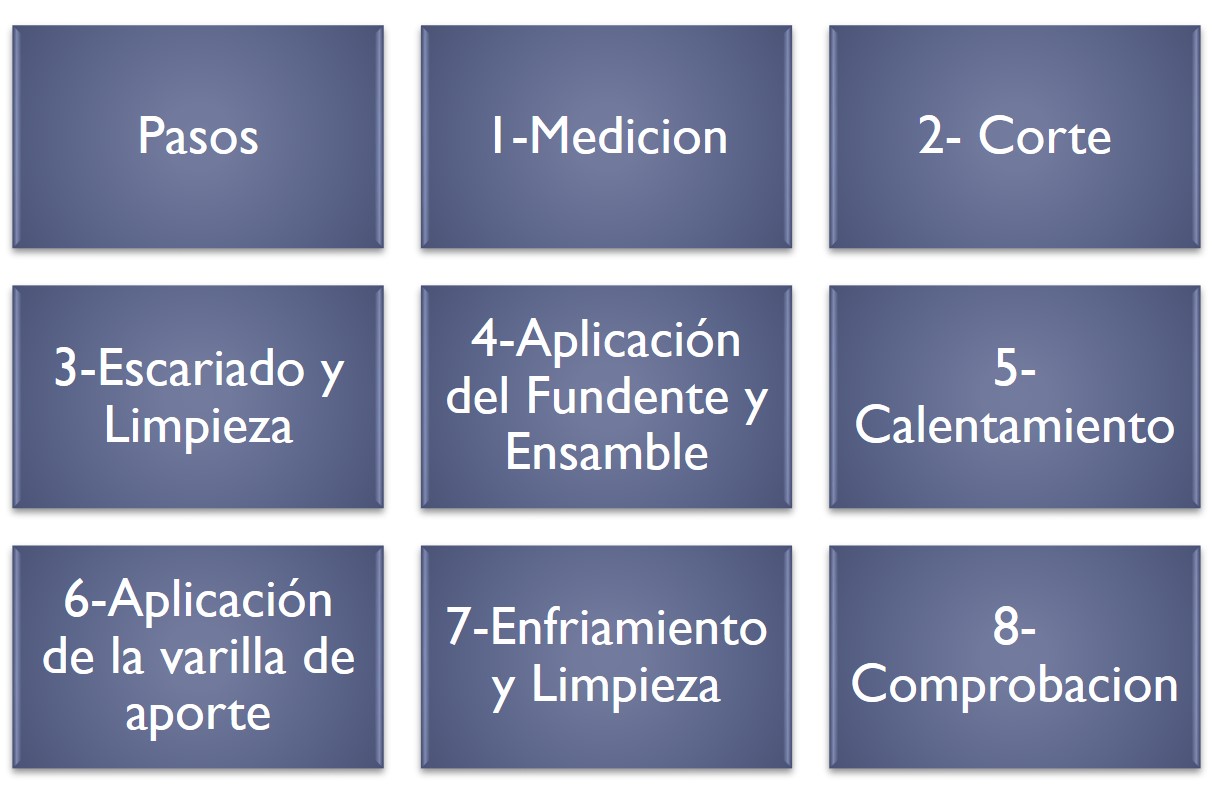
Soldadura en las líneas del compresor

  • Para soldar las líneas se tiene que lijar muy bien el cobre, esto facilitara el trabajo al momento de soldar.


Como  soldar cobre


Como remplazar un condensador de un equipo a/c

Instrucciones:
  • Apaga la alimentación de la unidad exterior a través de la desconexión eléctrica o del interruptor.
  • Retira la tapa del panel eléctrico del aire acondicionado quitando los tornillos que lo sujetan a la unidad.
  • Comprueba con tu voltímetro que el equipo está apagado al fijar tu medidor para medir el voltaje y tocando el extremo de la sonda en el lado principal del contactor.        
  • Aquí es donde los cables entran en la unidad.  Debes leer sin voltaje.
  • Utiliza un destornillador para conectar a tierra las terminales del condensador al gabinete metálico del acondicionador de aire. Esto descargará cualquier carga almacenada en el condensador. 
  • Anota los colores del cable, de dónde vienen y a qué terminal del condensador se conectan. También puedes comprobar el cableado de alimentación con el diagrama de cableado en la parte interior de la cubierta del panel.
  • Retira el tornillo de montaje que mantiene el condensador en su lugar. Utiliza tus alicates para quitar los cables. Lee la etiqueta de especificaciones del condensador y sustitúyela por una del mismo voltaje e índice de microfaradios. Por ejemplo: 35/5 mfd. @ 370 voltios.
  • Monta el condensador nuevo en lugar del viejo y asegura con el tornillo de montaje. Vuelve a conectar los cables de acuerdo con la forma en que los montaste en el condensador viejo.
  • Vuelve a colocar la cubierta del panel eléctrico y asegúrala con los mismos tornillos que quitaste antes. Re-conecta la energía a la unidad. 

Cómo reemplazar un evaporador de aire acondicionado

  • Asegúrate de que el aire acondicionado de ventana está desconectado de cualquier fuente de energía antes de comenzar a limpiarlo.
  • El condensador de tu unidad de ventana puede almacenar electricidad aun cuando el equipo esté desenchufado.
  • Retira la tapa del panel eléctrico del aire acondicionado quitando los tornillos que lo sujetan a la unidad.
  • Lee la etiqueta de especificaciones del condensador y sustitúyela por una del mismo voltaje e índice de microfaradios. 
  • Monta el nuevo condensador y vuelve a colocar la cubierta del panel eléctrico y asegurarla con los mismos tornillos que quitaste antes. 

Prueba de arranque.

Para verificar que todos los reemplazos realizados o por realizar se debe de realizar una prueba de arranque en donde se verificara que no haya algún problema en el equipo.

Wednesday, June 13, 2018

REFRIGERATION CYCLES PART 2

THE IDEAL VAPOR-COMPRESSION REFRIGERATION CYCLE

The vapor-compression refrigeration cycle is the ideal model for refrigeration systems, air conditions and heat pumps.

It consists of four processes:

1-2 Isentropic compression in compressor.

2-3 Constant-pressure heat rejection in a condenser.

3-4 Throttling in an expansion devise.

4-1 Constant-pressure heat absorption in an evaporator.

The  process  in  ideal  vapor  compression  refrigeration cycle:

The  refrigerant  enters  the  compressor  at  state 1 as saturated vapor and is compressed isentropically to the condenser pressure. The temperature of the refrigerant increases during this isentropic compression process to well above the temperature of the surrounding medium.

The refrigerant then enters the condenser as superheat vapor at state 2 and leaves as saturated liquid at state 3 as a result to the heat rejection to the surrounding. 

The saturated liquid at state 3 enters an expansion valve or capillary tube and leaves at  evaporator pressure.  The temperature of refrigerant drop below the temperature of  refrigerated  space  during  this  stage.  

The  refrigerant enters the evaporator at stage 4 as saturated mixture and it completely evaporate by absorbing the heat from the refrigerated space. The refrigerant leaves the evaporator as saturated vapor and reenters the compressor, completing the cycle.

ACTUAL VAPOR-COMPRESSION REFRIGERATION CYCLE

An actual vapor-compression refrigeration cycle differs from the ideal one owing mostly to the irreversibilities that occur in various components, mainly due to fluid friction (causes pressure drops) and heat transfer to or from the surroundings.

The COP decreases as a result of irreversibilities.

DIFFERENCES

  • Non-isentropic compression
  • Superheated vapor at evaporator exit
  • Subcooled liquid at condenser exit
  • Pressure drops in condenser and evaporator 
In the ideal cycle, the refrigerant leaves the evaporator and enters the compressor as saturated vapor.  In practice, however, it ·may not be possible to control the state of the refrigerant so precisely.  Instead, it is easier to design the system so that the refrigerant is slightly superheated at the compressor inlet.

This slight overdesign ensures that the refrigerant is completely vaporized when it enters the compressor. Also, the line connecting the evaporator to the compressor is usually very long; thus the pressure drop caused by fluid friction and heat transfer from the surroundings to the refrigerant can be very significant. The result of superheating, heat gain in the connecting line, and pressure drops in the evaporator and the connecting line is an increase in the specific volume, thus an increase in the power input requirements to the compressor  since steady-flow work is proportional to the specific volume.

The compression process in the ideal cycle is internally reversible and adiabatic, and thus isentropic.  The actual compression process, however, involves frictional effects, which may increase or decrease the entropy, depending on the direction.  

Therefore, the entropy of the refrigerant may increase or decrease during an actual compression process depending on which effects dominate.  The compression process may be even more desirable than the isentropic compression process since the specific volume of refrigerant and thus the work input requirement are smaller in this case.  

Therefore, the refrigerant should be cooled during the compression process whenever it is practical and economical to do so.

In the ideal case, the refrigerant is assumed to leave the condenser as saturated liquid at the compressor exit pressure. In reality, however, it is unavoidable to have some pressure drop in the condenser as well as in the lines connecting the condenser to the compressor and to the throttling valve. 

Also, it is not easy to execute the condensation process with such precision that the refrigerant  is a saturated  liquid at the end, and it is undesirable  to route the refrigerant  to the throttling valve before the refrigerant is completely condensed. 

Therefore, the refrigerant is subcooled somewhat before it enters the throttling valve. We do not mind this at all, however, since the refrigerant in this case enters the evaporator with a lower enthalpy and thus can absorb more heat from the refrigerated space. 

The throttling valve and the evaporator are usually located very close to each other, so the pressure drop in the connecting line is small.


Monday, June 11, 2018

REFRIGERATION CYCLES PART 1

In this article we are reviewing the factors involved in selecting the right refrigerant for an application.

REFRIGERATORS

The transfer of heat from a low- temperature region to a high-temperature one requires special devices called refrigerators.


Refrigerators are cyclic device, and the working fluids used in the refrigeration cycles are called refrigerants. 

HEAT PUMPS

Another   device   that   transfers heat from a low-temperature medium to a high-temperature one is the heat pump


Refrigerators and heat pumps are essentially the same devices; they differ in their objectives only. 

The objective of a refrigerator is to remove heat (QL) from the cold medium.

The objective of a heat pump is to supply heat (QH) to a warm medium.

The cooling capacity of a refrigeration system is the rate of heat removal from the refrigeration space  is often expressed in terms of ton of refrigeration.

The capacity of a refrigeration system that can freeze 1 ton of liquid water at 0 °C into ice at 0 °C in 24 h is said to be 1 ton.

VAPOR-COMPRESSION REFRIGERATION CYCLE

Two modes of operations:

1. Ideal vapor-compression refrigeration cycle
2. Actual vapor-compression refrigeration cycle


THE IDEAL VAPOR-COMPRESSION REFRIGERATION CYCLE

The vapor-compression refrigeration cycle is the ideal model for refrigeration systems, air conditions and heat pumps.

It consists of four processes:

1-2 Isentropic compression in compressor.

2-3 Constant-pressure heat rejection in a condenser.

3-4 Throttling in an expansion devise.

4-1 Constant-pressure heat absorption in an evaporator.

The  process in ideal vapor compression  refrigeration
cycle:

The  refrigerant  enters  the  compressor  at  state 1 as
saturated vapor and is compressed isentropically to the
condenser pressure. 

The temperature of the refrigerant increases during this isentropic compression process to well above the temperature of the surrounding medium.

The refrigerant then enters the condenser as superheat
vapor at state 2 and leaves as saturated liquid at state 3
as a result to the heat rejection to the surrounding.

The saturated liquid at state 3 enters an expansion valve or
capillary  tube  and  leaves  at  evaporator  pressure.  The
temperature of refrigerant drop below the temperature
of  refrigerated  space  during  this  stage.  

The  refrigerant enters the evaporator at stage 4 as saturated mixture and it completely evaporate by absorbing the heat from the refrigerated space. The refrigerant leaves the evaporator as saturated  vapor and reenters the compressor, completing the cycle.  

Notice that the ideal vapor­ compression refrigeration  cycle is not an internally reversible cycle since  it involves an irreversible (throttling) process. This process is maintained in the cycle to make it a more realistic model for the actual vapor­ compression refrigeration cycle. If the thronling device  were replaced by an isentropic turbine, the refrigerant would enter the evaporator at state 4´ instead of state 4. As a result, the refrigeration capacity  would increase and the net work input would decrease (by the amount of work output of the turbine). Replacing the expansion valve by the turbine is not practical since the added benefits cannot justify the added cost and complexity


SELECTING THE RIGHT REFRIGERANT

• Several refrigerants may be used in refrigeration systems such as chlorofluorocarbons (CFCs), ammonia, hydrocarbons (propane, ethane, ethylene, etc.), carbon dioxide, air (in the air-conditioning of aircraft), and even water (in applications above the freezing point).

•    R-11, R-12, R-22, R-134a, and R-502 account for over 90 percent of the market.

•    The industrial and heavy-commercial sectors use ammonia (it is toxic).

•    R-11 is used in large-capacity water chillers serving A-C systems in buildings.

•    R-134a (replaced R-12, which damages ozone layer) is used in domestic refrigerators and
freezers, as well as automotive air conditioners.

• R-22 is used in window air conditioners, heat pumps, air conditioners of commercial buildings, and large industrial refrigeration systems, and offers strong competition to ammonia.

• R-502 (a blend of R-115 and R-22) is the dominant refrigerant used in commercial refrigeration systems such as those in supermarkets.

• CFCs allow more ultraviolet radiation into the earth’s atmosphere by destroying the protective ozone layer and thus contributing to the greenhouse effect that causes global warming. Fully halogenated CFCs (such as R-11, R-12, and R-115) do the most damage to the ozone layer. Refrigerants that are friendly to the ozone layer have been developed.

• Two important parameters that need to be considered in the selection of a refrigerant are the temperatures of the two media (the refrigerated space and the environment) with which the refrigerant exchanges heat.


Wednesday, June 6, 2018

REPAIR A AIR CONDICIONER - MAKE A SYSTEMATIC ANALYSIS


When an air conditioner failure, changing parts might be the first reaction, BUT...


  1. May not be necessary and...
  2. Does not always solve the problem


SUPERHEAT AND SUCTION PRESSURE

SYMPTOMS CAN PROVIDE THE REAL CAUSE.


1.       Moisture, dirt, wax

2.       Undersized valve

3.       High superheat adjustment

4.       Gas Charge condensation

5.       Dead thermostatic element charge

6.       Wrong thermostatic charge

7.       Evaporator pressure drop – no external equalizer

8.       External equalizer location.

9.       Restricted or capped eternal equalizer

10.   Low refrigerant charge

11.   Liquid line vapor

a.       Vertical lift
b.       High friction loss
c.       Long or small line
d.       Plugged drier or strainer

12.   Low pressure drop across valve

a.       Undersized distributor nozzle or circuits
b.       Low condensing temperature


1.       Oversized valve

2.       TEV seat leak

3.       Low superheat adjustment

4.      Bulb installation

a.       Poor thermal contact
b.       Warm location

5.       Wrong thermostatic charge

6.       Bad compressor – low capacity

7.       Moisture, dirt, wax

8.       Incorrectly located external equalizer


1.       Low load

a.       Not enough air.
b.       Dirty air filters
c.       Air too cold.
d.       Cool icing

2.       Poor Air distribution

3.       Poor Refrigerant distribution

4.       Improper compressor-evaporator balance

5.       Evaporator oil logged

6.       Flow from one TEV affecting another´s bulb


1   


© PARKER HANNIFIN CORP 2018

Wednesday, May 30, 2018

MI AIRE ACONDICIONADO SE CONGELO Y NO ENFRIA


La congelación del aire acondicionado es un problema muy común que afecta a decenas de miles de equipos al año. Mucha gente piensa inmediatamente que el aire acondicionado se ha congelado debido a una fuga de gas, pero a veces la razón no es esa.

La congelación, en la mayoría de los casos es causada por algo que impide el flujo de aire, aunque también la suciedad, los cambios de temperatura e incluso problemas con el motor, pueden causarla.

BAJA TEMPERATURA AMBIENTAL EXTERIOR

La temperatura exterior puede causar la congelación de las líneas de refrigerante. Los acondicionadores de aire no están diseñados para funcionar a temperaturas inferiores a 15ºC (59 ºF), aunque dependiendo de la marca esto varía.

Si la temperatura exterior es demasiado baja, la relación temperatura/presión puede verse afectada.

Cuando baja la temperatura exterior, baja también la temperatura del sistema de refrigeración y el serpentín (coil) del evaporador puede llegar a congelarse.

El resultado es que el serpentín (coil) del evaporador comienza a producir hielo. Este problema se produce con más frecuencia en otoño e invierno.

Si ocurre este problema trate de colocar el aire acondicionado en la posición de ventilación, de esta forma comenzará a eliminar el hielo.

FILTROS SUCIOS

La principal causa de la congelación del aire acondicionado son los filtros sucios, por lo que recomendamos limpiarlos o sustituirlos con la frecuencia recomendada por el fabricante.

Si esto no se hace, el dispositivo no funcionará correctamente, provocando la congelación.

SERPENTÍN (COIL) DEL EVAPORADOR SUCIO U OBSTRUIDO

Si nota que el serpentín (coil) del aire acondicionado se está congelando es hora de hacer un mantenimiento regular de los equipos.

Para evitarlo, es recomendable hacer el mantenimiento preventivo al menos 1 vez al año.

Se debe limpiar el serpentín (coil) y retirar los residuos acumulados en la unidad, y es recomendable que este trabajo se realice por un técnico autorizado y calificado para llevar a cabo este mantenimiento.

El serpentín (coil) del condensador está instalado en la unidad exterior. La tarea del condensador es disipar el calor que está siendo removido del recinto a acondicionar.

Del mismo modo que el serpentín (coil) del evaporador, se deben de retirar los residuos acumulados en la unidad.

Si el serpentín (coil) del condensador no se limpia regularmente una obstrucción del flujo de aire podría quemar el compresor, aumentando drásticamente el costo del mantenimiento correctivo.

Por es muy importante realizar el mantenimiento anual, ya que el flujo de aire bajo afecta a la totalidad del aparato.

LA FALTA DE CARGA DE REFRIGERANTE (GAS).

La carga de gas refrigerante adecuada es esencial para el perfecto funcionamiento de los equipos.

Si es demasiado alta o demasiado baja, la unidad tendrá que trabajar más para hacer circular el aire, puede hacer que el aire acondicionado se congele.

Si el equipo sigue funcionando sin gas, por algún posible escape o fuga de gas, el equipo puede dejar de funcionar por completo, causando defectos irreparables en el compresor (motor). Reemplazarlo, aumentara el costo de mantenimiento correctivo.

MOTOR DEL VENTILADOR PARADO

Cuando el motor del ventilador del evaporador o condensador no trabaja a su verdadera capacidad (quemado, detenido o funcionando forzadamente), también puede causar la congelación de la unidad, ya que el aire frío no circula.

Wednesday, May 9, 2018

CHANGING YOUR CENTRAL AIR FILTER FOR HEALTHIER AIR


If you have a moment, we would like to give you a quick breakdown on the importance of changing the air filter in your home’s HVAC system, as well as tell you how often your filter needs to be changed.
But question is: Why is Changing Your Air Filter so Important?

There are a number of different types of filters available on the market, each offering different benefits, but the fact remains that all types of filters need to checked, maintained and changed in order to function properly and safely.

To that end, why is changing your air filter so important?

First of all, a clogged air filter can cause extensive damage to your system. Thus, if you check your air filter’s condition regularly, you ensure the longevity of your system — saving yourself thousands in possible repair and replacement costs. Dirt and neglect are one of the leading causes of heating and cooling systems failing, yet such failure is completely avoidable.

Secondly, changing the air filter in your system ensures cleaner, fresher, healthier air. This is better for everyone in your home, particularly children and the elderly, and most especially for those suffering from allergies and/or asthma. In referring to the latter, a clean air filter means you are not constantly circulating dust, dust mites, pollen and other small particles in the air. Instead, your system will be able to purify the air, leaving it clean and healthy.

Thirdly, aside from protecting the HVAC system from unnecessary damage, cleaning out or changing a clogged air filter will also save you a significant amount on operating costs. In simplest terms, a dirty air filter uses much more energy than a new, clean air filter, which means a much higher electricity bill for you. You can, by keeping your air filter clean and in good condition, save up to 15% on utility costs.

To the above point on energy wastage, failing to clean and replace your air filter on a regular basis is failing the environment. An air filter that is clogged means a harder working HVAC system, thus it also means a lot of carbon monoxide and other greenhouse gasses by extension being released. Going green and running your home in an eco-friendly manner need not necessarily mean bending over backwards and giving up all forms of comfort. Something as simple as changing an air filter regularly can go a long way in making a difference.

Thus, to conclude, changing your HVAC system’s air filter is important in every which way. Economically, health-wise and environmentally it simply makes sense!

To that point, how often should your air filter be changed? It differs depending on the different types of filters, but anywhere between 1 and 3 months is advised, with the former being preferable and the latter being the absolute maximum you should allow between changes.

If you have any questions or concerns regarding any of your HVAC needs please feel free to contact your friends at Green Apple Mechanical NJ toll free at 888-611-7191.
You can find this article in the web of Green Apple Mechanical http://www.greenapplemechanical.com/1409-2.
Green Apple Mechancial is a full service HVAC contractor specializing in heating, air conditioning and plumbing in New Jersey.